Showing posts with label projects. Show all posts

Monday, May 31, 2010

Pulling Your Weight

Today the youngster and I stopped in at the Harbor Freight store. Not for anything in particular, unless I saw a good deal on a bench vise, perhaps, but mainly because I'd never been before. It's an impressive collection of tools they have there, at equally impressive prices. Too bad the quality is not equally impressive. Still, I'd shop there again for things where price was the most important factor. And it's not like it's all horrible crap, most of the stuff is fairly good, and a fairly good deal at the price.

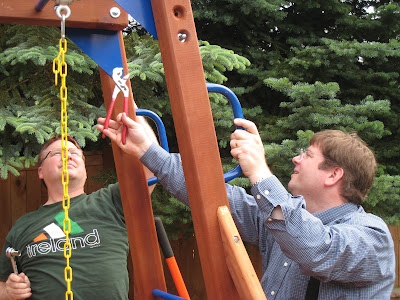
While there, I saw a winch. A hand-cranked winch. A hand-cranked winch with cable for less than twenty bucks. A hand-cranked winch with cable for less than twenty bucks that would be just dandy for a certain Secret Clubhouse application - the retractable ladder. Sold!

Let's see how it looks:


It does the job. I think I need to work on a housing, or it'll be rusted in no time.

Friday, May 14, 2010

The Secret Clubhouse


First, a disclaimer. The clubhouse is not a secret. Its name is "The Secret Clubhouse."

The youngest member of the family has been clamoring for a clubhouse for a couple of years, at least. The play fort atop the big play structure just wasn't cutting it. I suspect it started with a Berenstain Bears book, No Girls Allowed. The book describes a clubhouse built by the boys with a door and windows and intriguingly, a drawbridge to keep out the girls. Many drawings of clubhouses were made, all with drawbridges and windows. I'd regularly get asked if we could build a clubhouse "right now" and I was always putting the kid off. We had sufficient play areas, after all, but they weren't what he wanted.

Last month, I'm not entirely sure why, I agreed to build a clubhouse. Some of the reason, of course, is the recapitulation of my own childhood in what I see of my child's activities and interests. I wanted to have a clubhouse again, too.

When I was small, my dad built a succession of sandboxes for me and my siblings, but the first ones were mainly for me. There was a tractor tire to start with, and when we moved to Cody, Wyoming, Dad built the first wooden sandbox. We moved back to Boise, and Dad built a bigger sandbox, then later enlarged it. It had several sizes over the years, larger and then smaller again, but at its largest it was easily the biggest sandbox I've ever seen in a private yard, and I've only ever seen one park with a bigger sandbox. Maybe sixteen by twenty feet or thereabouts, big enough for a swingset with lots of room left over. He had the sand delivered by dump truck, taking down a fence so it could back into the back yard and drop several yards of sand in directly. There was a LOT of sand in there. On a couple of the iterations, Dad put up some 4x4 posts, with the intention of building some kind of elevated play space like a clubhouse on top. Our neighborhood was built on former farmland, and there were no mature trees that would make for a good tree house in our yard or for several blocks for that matter, so the posts were actually a pretty reasonable idea. Unfortunately, posts were as for as we got for several years. Those posts were there with nothing atop them, until they rotted at the bottom and got pulled out. Dad finally built us an entirely different sort of playhouse on a telephone pole he had installed in the back yard, which was pretty cool. That's a story for another time.

Remembering the posts, and having some spare ones when I was building the play space in my own back yard, I put up four of them in the corner, spaced about eight feet apart. I thought that corner would make a good sandbox, and I'd put up some sort of roof to keep the sun and the rain at bay. I still think it would make a good sandbox, but I decided to put the posts to another use - a Secret Clubhouse.

The first thing to do was to make a deck. Some might say I should have made a plan before I made a deck, but I figured I'd need a deck regardless, so I started with that. I've got very little experience building decks, but I helped on a couple, and it didn't seem that hard. I cut the corner poles to the same height, about five feet above the level of the wood chips in the play space, hoping to minimize the potential fractures and lawsuits. I put some boards around the outside, put joist hangers on them every 16" and hung the joists, then screwed down a bunch of cedar deck boards on top. Voila, instant deck, pretty close to 8' square.


Next, I needed a design for a clubhouse. Searching online was not especially helpful. Unlike most info on the internet that wants to be free, practically all the interesting playhouse/fort/clubhouse plans were ones that they wanted money for - all you get is a mediocre photo. So I doodled up one of my own. It was really simple, roughly a six-foot square with one corner lopped off where the door would go. Big enough for a father and son campout, basically, with a couple extra feet of deck on two sides for play. I decided on a shed roof, and a sloping height from five feet to about six and a half, so I could stand up in there without whacking my head in part of it, at least. I would frame it with 2x3 studs and use some sheet siding for the exterior. I did a little bit of calculating for the angles, and came up with a framing plan.

Next came some trips to Home Depot. I had a fair number of things on hand, but I needed the siding and the studs. I started by cutting all the siding into the shapes I needed, then cut and screwed the stud framing together for each wall, and then screwed the siding onto the framing. The walls weren't too big, and I figured I could lift each wall onto the deck by myself in a pinch. After getting them put together, I hefted them onto the deck and screwed them down and to each other. It took a few evenings to get them all put together and then installed, probably a couple of days per wall all told. While working on the walls, I got the idea to install a trap door in one corner. I didn't want to cut into the deck, and the joists were fairly close together, so it was in a wall instead of the floor. Thus the Secret Escape Hatch was born.


After getting all the walls up, I worked on the roof next, putting together a frame of 1x3s and using some corrugated plastic, thinking it would be lighter, and possibly let some light inside. That last plan didn't work out; the stuff is surprisingly opaque. On the other hand, it was a lot easier to complete on the ground and lift up on top than a roof of shingles on plywood would have been. Getting it done took a few more days. Look at that, a play house that keeps the weather out. Unless it's really windy.

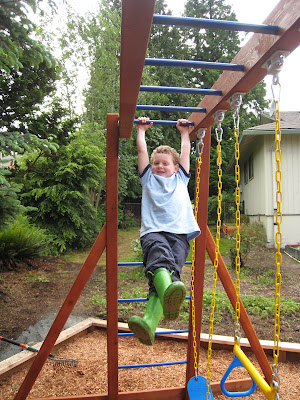
Next I put up a railing, so it would be safe enough to have kids over. The youngster had taken to jumping off the edge of the deck, so I figured it was time. I put together a rope ladder, but didn't anticipate a problem that it presented. Mr. Secret Clubhouse was very concerned that he be able to keep robbers out, thus he wanted a rope ladder that he could pull up, so the robbers wouldn't be able to get in. Unfortunately, a rope ladder wants to hang toward the center of gravity of whatever it's holding up when the bottom isn't anchored. That meant that as soon as he started climbing it, his feet would swing under the deck until he was mostly hanging from the ladder, and it was almost impossible to actually transition onto the deck. We stuck with using the regular ladder for a while while I considered the problem. I put together the bottom half of a dutch door and installed it next.

At this stage of completion we decided that the Secret Clubhouse was done enough and safe enough to have some friends over for an open house. The eager boy had been enthusiastically describing his new clubhouse and its progress to his classmates for three weeks or so, and now he could show it off. Some had been understandably skeptical. We emailed some invitations for the weekend, and prepared cookies and lemonade. I think we'd invited people to come between 11 and 4, and this turned out to be a bit too long - no one came until around 1:00 in the afternoon, so we were twiddling our thumbs for a while. I used the time to work on the top half of the door and get it installed. More and more kids came with time, and by the time the last one left, I think we'd had ten or more over. It was a big hit.

After the open house, I had an idea for a "drawbridge ladder" to get up to the secret escape hatch. This would satisfy the drawbridge urge and the need to keep baddies at bay in one swell foop. I put together a ladder with some thick hardwood dowels and some spare studs, and was thinking about how to make it liftable by a first-grader when the Exceptionally Competent Mrs. suggested swapping it for the rope ladder instead. This seemed like an excellent idea, so I shortened the ladder by one rung to fit on the deck on the other side. I made up some hinges out of lag bolts with nylon bushings and swapped out the rope ladder for the drawbridge ladder. The rope ladder had another rung added and went around to the secret escape hatch. I still haven't figured out a good way for the kid to lift it, but that will come.


The final addition has been windows. There are sliding windows inside in the back walls, and fixed windows in front by the door. They're all made of acrylic. The sliding ones have finger holes on either side and fit in slots cut in frames above and below the window openings. Having the windows in has cut down the draft a little bit, though there's still an airspace around the roofline. I got the last windows installed yesterday, so the Secret Clubhouse as planned is now complete. It could probably use some paint, but hey, it's a clubhouse.


Some say that kids should build their own clubhouses, treehouses, forts, etcetera, and I don't disagree. That usually comes a bit later, though, when they've mastered swinging a hammer. That time will come. For now, the Secret Clubhouse rules our back yard. Next up, some more garden boxes, like this one I've already finished.

Friday, February 26, 2010

Just a Minor Detail

On his second day sick at home, the younger member of the family remembered his crystal radio set and wanted to listen to it again. I got it down from the shelf in the office and we took it to the dining room and connected it to the ground and antenna wires that were still in place, and he gave it a good listen for a while on his headphones, then said he'd like to hook it up to speakers. I allowed as how the crystal radio set probably didn't have enough power to drive a speaker, so we'd need an amplifier of some kind for that. He asked if we could build an amplifier, and I thought that we could. I went downstairs and got out the old 300-in-one Advanced Electronics set I got in a nostalgic moment at a Radio Shack at least a decade ago, and started thumbing through the index for a suitable amplifier circuit.

Considering that my poor eyes could barely distinguish some of the resistor color code stripes, it took longer to build than the impatient one thought necessary. He also thought I was hogging all the cool assembly parts and he didn't get to help with enough of it either, but then it was finally done and we hooked it up to the outputs of the crystal set and switched it on.

Nothing.

Not that any longtime engineer would expect any different. Of course, one of the wires in the breadboard was in the wrong spot and that took another minute or two to find, but once found, the circuit worked just fine, and we were dancing along to KIXI AM 880 from our amplified speaker.
I think the discrimination in the crystal set is virtually non-existant; we're probably listening to a smear of the AM band about 200KHz wide, so tuning the variable capacitor (the soda can with the paper bit around it) we can often hear two or even three stations at once. Once the amplifier was working, naturally the boy had more requests.

"Can we pause it?"

Hmm. How to explain this to somebody who was born after the advent of the DVR? That's a little beyond the capabilities of the 300-in-one set, I'm afraid, though it would be cool for sure. "We'd need more parts. Lots more." Like a computer, I'm thinking, with a hard-drive recording system, just like in the DVR. For a boy who thinks his dad can build anything, that's just a minor detail.

"We can spend the weekend on it!"

Yep.

Sunday, December 27, 2009

With Cherry on Top

It's one of those projects that's taken years rather than days or weeks to execute, and it's still a long ways from done, but at least one major step was accomplished in the last few days.
When we bought our house with its interesting hexagonal living room, one of the areas that I thought could be improved was the wall with the fireplace. It was divided into two halves, one side brick to the ceiling with the fireplace and hearth, and one side covered with rough cedar planking as a sort of paneling. The most important omission of course, was a mantel, someplace to hang the Christmas stockings from and display a few knick-knacks. I never took any photos of the wall in its original form; you'll have to get this picture from the younger set's second birthday as an approximation.

I thought something more like a Craftsman style would go nicely, something simple and not too ornate, and I drew up a plan that would put some paneling over the brick with an opening around the fireplace and a simple shelf between the wall on one side, and some new cabinetry that would go on the other side, someplace to hold all the DVDs and CDs and stereo bits.
Starting in December of 2005, I went to work on the brick side of things. I drilled some holes in the brick and epoxied in some bolts to hold some plywood in place that would in turn have some paneling and the mantel attached.

I cut some plywood to fit and installed it, then put some thin prefinished cherry veneer ply over the top. I figured a new mantel would be held up by the wall on one side and the cabinets on the other, but put some more bolts sticking out through the plywood in case I thought of a way to float a shelf instead. We didn't actually need a place for the stockings that year, as we spent Christmas in Boise with my family, so the mantel got put off for a bit. A long, long bit. By the next Christmas, we needed something for those stockings, so I hacked together a bit of pine board as a temporary solution. Here's a picture, from our curly-haired offspring's fourth birthday party in 2007. I'd moved the thermostat into the hall, but thermostat bits remained behind for the longest time.

And there the project sat. Until early in 2009, when I decided to tackle the other side of the wall, the one with all the cedar planking. I was curious what was behind it; from what I could see, it looked to be ordinary drywall. I pulled all the planks off, and sure enough, it was drywall, full of holes from the nails that held the planks on, and with about a three inch gap to where the fireplace brick started. Curious. It looked like the chimney had been built after the space had been drywalled. I spackled the holes and wedged a 2x3 into the gap so it would support a bit more drywall, and this picture of a certain someone's sixth birthday party has a bit of the result in the background.

Once my work contract ended a couple of months ago, I figured I would have plenty of time for finishing off the project, but various other tasks, sickness, sleeping way in, more sickness, and a general lack of tuit intervened, until a couple of weeks ago, when I finally got to putting up the drywall bits to cover the gap, which a summer energy audit from the power company had shown to be a major heat escape route. Our gas bills are high enough, thank you very much. I considered repainting, and then thought I'd just run the paneling all the way across. It was intended for the back of the eventual cabinetry anyway. I cut and installed some more cherry veneer plywood, then got to work on the all-important shelf.
In the interim between putting in bolts for the mantel and actually doing something with them, probably sometime in 2007, I'd discovered that IKEA had a floating shelf as part of their LACK line that was very similar to what I wanted. They didn't have one in cherry, but I bought one anyway, thinking that perhaps I could either veneer it or just use the mounting hardware, especially as it was only $30. It didn't fit the space exactly, but it was close, and I could have tried either method. I wound up deciding to build my own shelf over the steel hardware. I had to drill some new holes in the mounting bracket to fit my bolts, but that part worked out very nicely. I made a simple torsion box with some light plywood, like so.

This is the glue step with more of my thin cherry plywood for the top and bottom of the shelf.

And this is what it looked like after I applied some 2" cherry veneer tape to the front and side edges, and applied some corbels I purchased from a woodworking supply store. I think I'd purchased these materials back in 2007 as well, around the time I picked up the shelf from IKEA. I applied some finish so they'd look roughly like they belonged together.

The next day, Christmas Eve, with the assistance of my short helper, we put up the mounting hardware.

Fitting the shelf over it was a little trickier on the wall than in the garage, since the wall was not entirely flat despite my best efforts, and hitting the internal holes in the shelf with the support arms was a bit of a challenge. I wound up sticking some pointed bits of wood in the ends of the support arms to guide them into the holes deep inside the shelf. After more fiddling and trips to the garage for sanding and fitting, the shelf was finally installed and screwed into place, just in time for our guests to arrive. We put up the stockings, ready for a visit from St. Nick that evening. He did not disappoint!

Now there's still a bunch of trim to add, and the whole cabinet plan may or may not happen, but hey, a mantel! And it only took four years (so far)!

Monday, July 21, 2008

Variations on a Theme

Last Wednesday the Formidable Mrs and I were discussing something to do with decorating, fairly late, and she mentioned wanting to have a headboard for the guest bedroom downstairs.

"Perhaps a padded headboard, some foam over some plywood, covered in duck." I allowed how that was doable. "We could maybe do tufted, with buttons."

I imagined a tufted, padded headboard, and suggested "with really big buttons? Like, dinner-plate sized?"

"Like your mom has in her sewing room?"

"Exactly."

"Where do you get those?"

"Dad made it, on the lathe. Hmm." At this point I'm thinking about what I might need a lathe for, and not much is coming to mind when she interrupts my reverie with "I don't think we need a lathe, lathes are scary."

"Yeah, okay, that's not a good enough reason to get a lathe. You know, to fit the theme of the room, we could do an Adirondack headboard. Just a bunch of vertical boards, rounded on top in a big hump."

"Oh, yes, or like a loveseat, with two humps. That would really go well in there."

Thus was born the Adirondack Headboard project. I went down and measured the bed and frame to get an idea of the dimensions we wanted and doodled up a design on some graph paper, then went looking around the garage, where I found some likely looking 1x6 pine boards I had on hand for the random woodworking needs that seem to come up once in a while. They looked just right. I had a 1x5 and a 1x3 laying about that would make good cross pieces. I set them out to work on the next day.


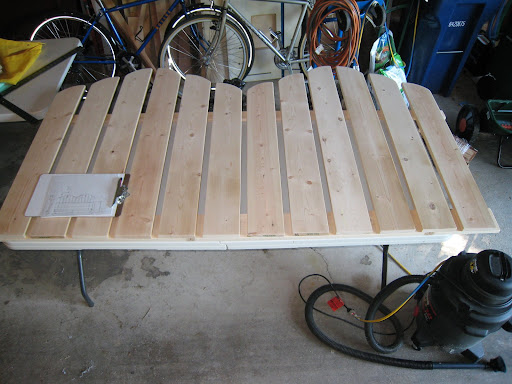
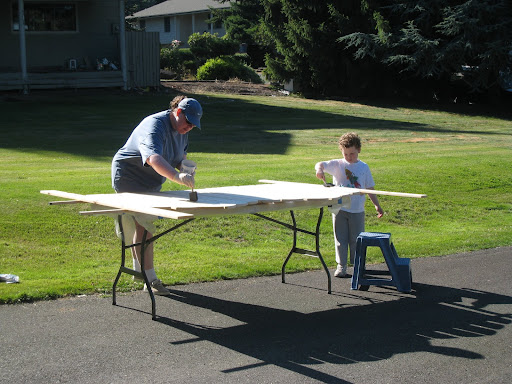
Did you know that a crescent wrench makes a reasonable compass in a pinch? I drew the arcs for the tops of the boards with a pencil in the jaws and my finger in the hole at the end of the handle of my 8" crescent wrench. After cutting all the boards to length with the chopsaw, I cut the curves with a jigsaw then sanded everything smooth with the random-orbit sander. Easy as pie. I've only ever made pumpkin pie, which is pretty easy, but I imagine some other sorts of pie may be somewhat more challenging. I laid out the cut and sanded parts as seen above. In the evening when we were all home, wife and son helped paint on some shellac to seal the porous, knotty pine boards up for painting.


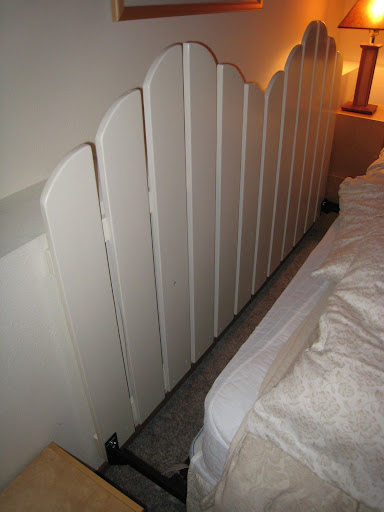
Another few rounds of sanding, painting with primer, sanding, painting with tinted primer, sanding, painting and sanding a couple more times, then spraying on about five coats of polyurethane varnish, which all told took another three days to complete, and finally adding a bit of hardware so it could attach to the bedframe, and we have something that looks like this.


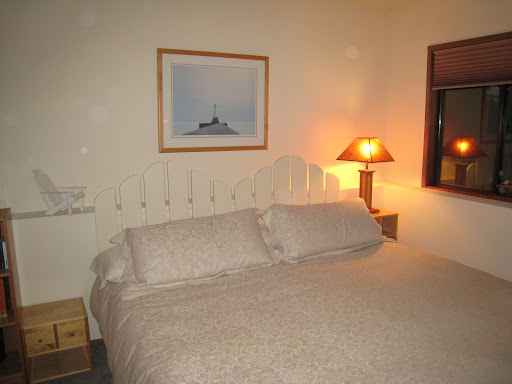
And with the bed pushed back into place, the finished product looks like this:


The guest bedroom now has a headboard that fits the theme of the room (well, the sort-of theme, we're not counting the treadmill as a theme element), that only took a few days from conception to completion, and looks like it was made to be there. Which it was.

I also doodled up a design for an Adirondack side table; we'll see if that ever happens.

Sunday, June 08, 2008

Finishing Touches

The sun came out again today, after being off vacationing somewhere else for a week, and just in time to finish the big play space project off. With some hefting assistance from PJMcD, we lifted and bolted the final sections of the play structure into place this afternoon.

The chief playtester gave it his squeal of approval.

Afterward, there was some well-earned relaxation time with the uncle.

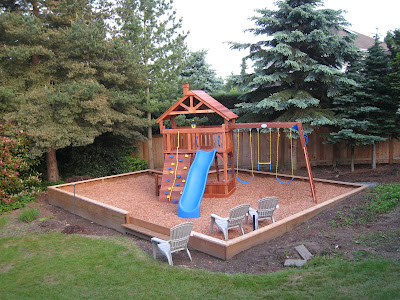
And here's how it looks all put together.

Now that I've seen how easily the chips get moved around under the swings and at the end of the slide, I'm planning on getting some rubber mats to put underneath the chips at those locations so they don't get dug into all the way to the bottom. Some rough spots in the wood could use some attention, too. And looking around at the edges of the pictures, it's clear I need to start working on the yard some more. Then it's time for the next project! And there are so many to choose from...

Saturday, June 07, 2008

How I Spent My Summer Vacation, Day 42

Today's post is a quick follow-up to yesterday's report on the play space. Since most of the play structure was put together in big assemblies in the garage already, I mostly just had to fit them together and apply fasteners of one sort or another once I got them hauled out to the play space. We set up a work table under our patio umbrella to hold the plans and parts.

Thereafter, it was mostly a case of drill,

screw,

and assemble the various parts together.

My chief assistant did some enthusiastic quality assurance.

Here's where we left off today. The next task is to put together the swing set, which will require more heavy lifting than I can manage on my own, so we'll do that tomorrow.

Friday, June 06, 2008

Play is Serious Business

For the past month, I've been busily assembling a play structure that we purchased a year ago from Costco and which sat in its very heavy boxes taking up a big chunk of our garage for most of that year. Despite the instructions calling for two people, I managed to put together large sections of it single-handedly in a couple of weeks' worth of evenings, until I'd pretty much run out of things I could assemble in the garage. I needed a place to assemble the final product out of the large sections I'd put together, so it was time to look at the yard. The plan has always been to use the garden space, since our gardening needs do not really require such a huge space. In fact, as you see below, we've done about all our gardening this year, except for some left-over strawberries, in a cedar raised bed. The carrots and sweetpeas are coming along nicely, as our chief gardener demonstrates here.

The garden space had a couple of bushes removed by our disappearing gardener back in January, and so when I began preparations in earnest, it looked something like this.

Next, I found a level line with my framing level and a laser and marked the fence and some stakes I drove in at the rough corners of the play space, so I'd know what I needed to move around, dirt-wise, to have a level space. To avoid some trees, I decided to make the space a skewed rectangle, roughly 24' by 28' in size, and marked the corners with some garden poles we inherited with the house and some mason's line at the rough top of what I thought the play space border would be.

A couple of years ago we had some landscaping cleanup done, and the landscapers had put down a ton of beauty bark in the garden to control the weeds, and I am not speaking figuratively. I scraped off all of the beauty bark in the play space area and a bit beyond, a layer two inches thick in places, because I didn't want that to be part of the dirt I moved around to level the play space - it would be breaking down and compacting forever if I left it in, so I wanted to just be dealing with bare dirt. I had at least a couple of yards of bark when I was done, most of it clean enough for reuse, so I stashed that under our big cedar tree.

Most of the garden space had only a relatively thin layer of topsoil, over some rocky hardpan that wasn't going to respond to a shovel easily. I rented a big tiller from Home Depot and ground away at the high side, shoveling the softened dirt and rocks over onto the low side until I'd reached the approximate level I wanted within the playspace. It looked something like this.

I considered big railroad tie timbers for a border, but decided I'd rather have a box built with pressure-treated lumber around some posts, so I purchased a bunch of lumber and posts and cedar boards for a top rail. It took two trips in the heavily loaded van to get it all home.

I went back to Home Depot and rented a one-man augur with a 6" bit (that's diameter, not length) and got to drilling. Wrestling the augur against the rocks in the holes was a serious chore, and I wound up taking a couple of days completing all the hole drilling, what with stopping to dig out some rocks with my post hole shovel in practically every other hole, not to mention cleaning out all the dirt that remained after pulling out the augur. Once while my main helper was watching, the augur caught on a rock and twisted itself right out of my hands with the throttle on, and we watched it spin itself around for a while, highly entertained, before I grabbed it and shut it off.

Following in my father's footsteps, I decided to stick in an extra post for a possible future treehouse sort of affair in one corner of the play space and leave the posts tall in that corner. The rest of the posts I cut off as I went, bolting them to the lumber and maintaining a level and for the most part square line around the play space as I went. I added a cedar top rail around the edge, and a step area for easy access from the yard.

Once the border was enclosed and everything bolted together, I filled in around the posts, and levelled the dirt inside the playspace, with a slight slope from one side to the other for drainage, and packed down the loose dirt. Then I got some weed barrier and some humongous staples and covered it all up. And that was all I could do myself until I got something to fill the play space with. There had been a long run of nice weather while I busily worked up a sweat every day, but it finally came to an end about the same time I finished.

While it rained, I called around to find out about play chips. There was one company that would blow it in for you, but I didn't like their chips very much - too big. Another place would deliver with a blower truck, but you were supposed to do the actual blowing with the hose yourself. Interesting idea, but I didn't like their play chips, either - too much bark and slivery bits. I went with a slightly more expensive alternative, cedar chips from the Rainbow Play Systems outfit, and paid to have it installed. They came today, about five hours later than originally expected, and filled the play space up. Their chips came in bags on tall pallets, which they dumped out of their truck in our driveway, and hauled around to the backyard in a wheel barrow. My assistant helped with the raking.

Now that there are play chips, I can haul out the parts I've put together in the garage and start working on the final assembly. We should be done this weekend, unless it really, really pours down.